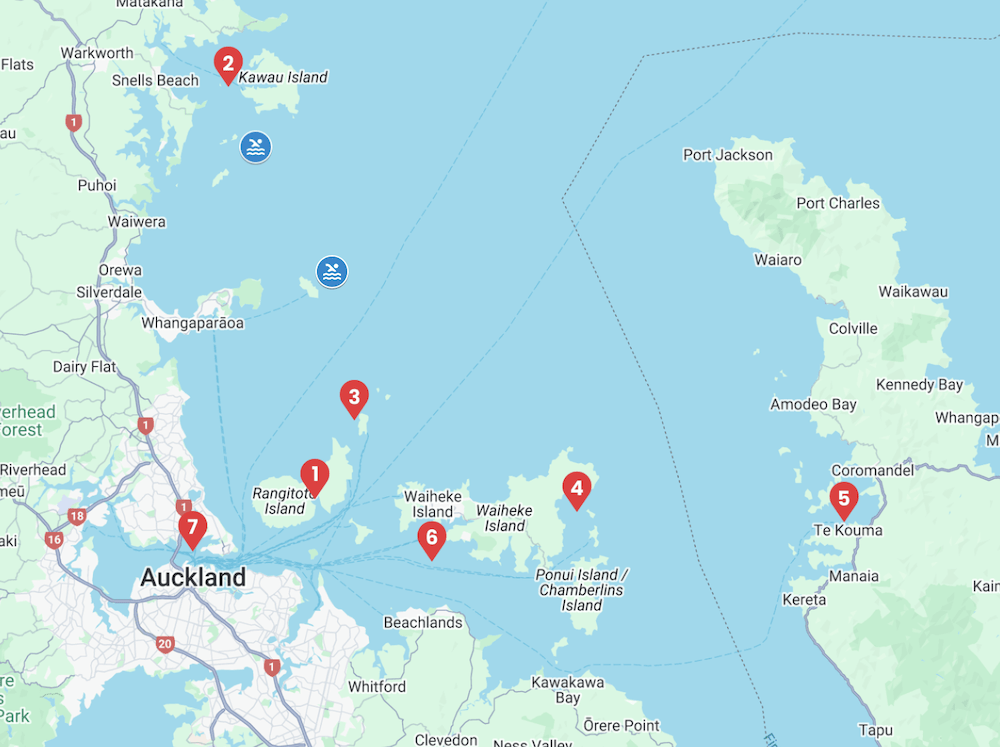
This Hauraki Gulf Auckland Sailing route circles from city-side Bayswater to Rangitoto’s lava fields, wildlife-rich sanctuaries, Kawau’s history, quiet Rakino anchorages, and Waiheke’s vineyards before reaching the green hills of Te Kouma. Short day passages, varied anchorages, and plenty of shoreside walks keep every crew member smiling.
7 days
128 nautical miles
Bayswater Marina → Islington Bay (Rangitoto Island) → Kawau Island → Rakino Island → Man o’ War Bay (Waiheke Island) → Te Kouma / Whanganui Island (Coromandel) → Putiki Bay (Waiheke Island) → Bayswater Marina
Highlights
A relaxed Hauraki Gulf Auckland Sailing circuit linking volcanoes, wildlife sanctuaries, quiet islands, vineyards, and sheltered Coromandel bays.
Overview
The Hauraki Gulf sits right off Auckland’s waterfront, yet once you clear the harbour bridge it feels like a different world. Dozens of islands scatter across the gulf: volcanic cones like Rangitoto, bushy wildlife sanctuaries such as Tiritiri Matangi and Motutapu, and low, quiet spots like Rakino and Ponui. Protected waters and mostly short hops make this one of the best places for Hauraki Gulf Auckland Sailing, whether you’re on a family charter or stretching a new boat’s legs. Auckland’s climate brings warm summers, mild winters, and sea temperatures that peak around the low twenties, ideal for swimming during the main sailing season. Bays and harbours offer sheltered anchorages for most wind directions, plus marinas like Bayswater with power, water and easy links into the city. One blustery afternoon out here I confidently told a friend, “It’ll just be a gentle sea breeze.” An hour later we reefed twice and both of us were laughing at my optimism. The gulf has that character: friendly, usually forgiving, but never boring. This voyage strings together classic stops and quieter corners in a way that feels achievable, interesting, and nicely varied.
Special Gems
This Hauraki Gulf Auckland Sailing journey gives you a tidy mix of city access, island walks, and coastal wineries. From Bayswater you’re a short ferry ride from downtown Auckland or Devonport’s cafés and harbourfront promenade.
From Bayswater, Maungauika / North Head is worth more than a casual stroll: the hill is honeycombed with old tunnels, gun emplacements and searchlight positions from Auckland’s coastal defence network, all explorable on a well-marked self-guided walk.
To the east of Waiheke, Rotoroa Island offers an optional side trip by local ferry or guided outing: a restored wildlife sanctuary with walking tracks, an exhibition on the island’s social history, and quiet swimming beaches.
To the south of Waiheke, Ponui Island, a privately owned but welcoming-feeling spot with anchorages such as Shingle Cove often described as golden and undeveloped, and visited by dolphins at dawn. Access ashore is limited and you should respect any local guidance, but even from the anchorage it feels wonderfully peaceful.
Whales & Marine Mammals: The Hauraki Gulf hosts some of New Zealand’s richest marine life, and several species may be encountered naturally along this itinerary, particularly on Days 2, 3, and 6 as you cross wider open-water corridors.
– Bryde’s Whales – the Gulf supports a year-round resident population. They are most commonly seen in the central Gulf, including the waters between Rangitoto, Tiritiri Matangi, Kawau, and outer Waiheke. Slow surface-feeding behaviour offers excellent viewing from a respectful distance.
– Common Dolphins – extremely frequent throughout the entire sailing area. Large pods often appear between Rakino, Waiheke, and Kawau, sometimes bow-riding or feeding around baitfish schools.
– Orca (Killer Whales) – occasionally move through the Hauraki Gulf and show a particular interest in shallow coastlines around Rangitoto, Motutapu, Rakino, and Waiheke. Their visits are unpredictable but visually dramatic when they coincide with your passage.
– Minke & Sei Whales – uncommon but possible in deeper stretches of the Gulf. Sightings tend to be brief but are most likely in the outer channels your route naturally crosses.
– Humpback Whales – migratory and typically seen during winter or early spring, but rare summer pass-throughs do occur. They are travellers rather than residents.
Seasonally, local events around Auckland and Waiheke—food festivals, regattas and markets—can add another layer to your trip, but schedules change each year, so treat them as a bonus rather than a core part of planning and always verify current dates and details before you set off.
Not an attraction but certainly a special mention – Hauraki Express’s new fuel bunkering vessel, Midnight Oil will deliver diesel to your vessel within the Hauraki Gulf 7 days a week during daylight hours https://haurakiexpress.co.nz/hauraki-express-fuel/
Passage Conditions & Navigation Profile
Mainly northerly to south-westerly winds, fast fronts in spring and autumn. Tides of 2 to 3.3M
Read MoreLess
The Hauraki Gulf has a mild marine climate with summer sea-breezes, mainly northerly to south-westerly winds, and stronger south-westerlies and fast fronts in spring and autumn; seas are usually moderate but can be steep in wind-against-tide near channel mouths. Navigation is mostly line-of-sight between prominent islands, but a passage plan, current charts and awareness of shipping lanes are essential in channels such as Rangitoto, Tiri and Colville. Tides are semi-diurnal with ranges around 2–3.3 m and typical streams of 0.5–1 kn, rising towards 2 kn in constricted channels, so timing for tidal gates improves comfort and safety.
Day 1 – Bayswater Marina to Islington Bay (Rangitoto Island)
8 nautical miles
1hr 30mins sailing time
LUNCH STOP:none planned
MOORING:Anchor in Islington Bay mud; private swing moorings nearby. Use wharf only for loading; contact marinas for rates
Description
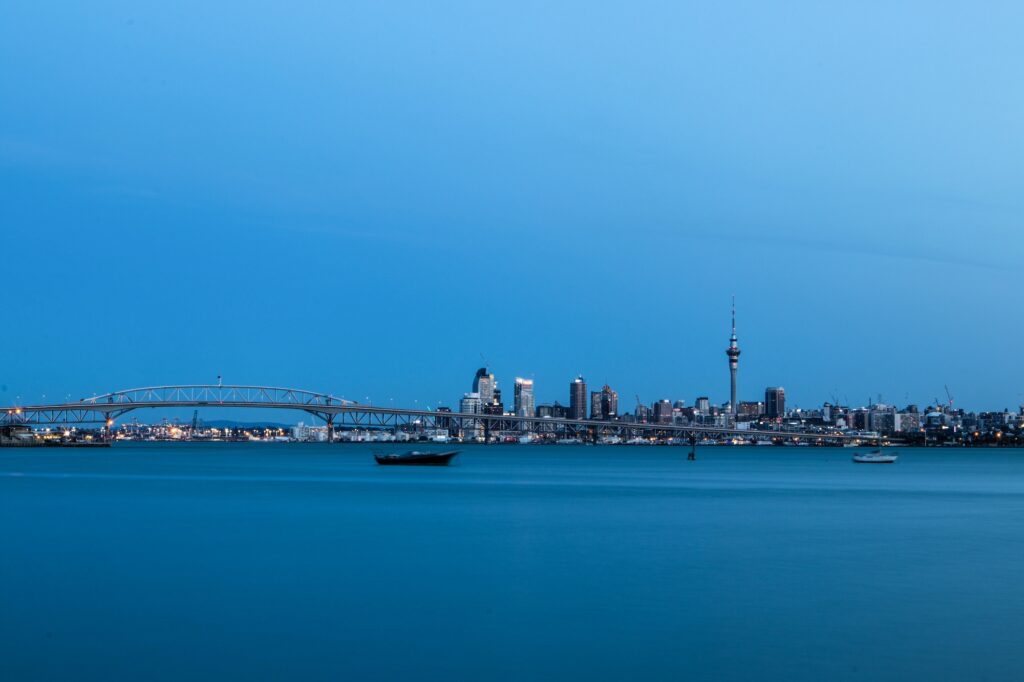
Bayswater Marina feels very much like a gateway: city skyline to the west, Rangitoto’s dark cone to the east. Berths have power and water, with solid shore facilities and frequent ferries linking you straight into central Auckland, so it’s an easy place to provision and meet crew. As you slip lines and head out, the harbour bridge and city towers ease behind you. The water gradually feels less “city” and more open as North Shore suburbs give way to the wider Waitematā. Rangitoto grows larger ahead until Islington Bay reveals itself as a calm notch between Rangitoto and Motutapu. The anchorage sits under bushy ridgelines, with the odd DOC-style jetty, walking tracks starting almost from the dinghy. On quiet evenings, anchor lights speckle the bay and the city glow becomes a soft reminder rather than centre stage.
Attractions
From Bayswater, a quick ferry ride lets you explore Auckland’s waterfront, galleries and restaurants before departure or on your final night, with Devonport’s village streets and North Head walks close by. Once settled in Islington Bay, the real fun is on foot. Well-marked tracks lead across Motutapu and up Rangitoto’s summit, through lava fields, regenerating native bush, and old lava caves near the top. Department of Conservation routes range from easy shoreline strolls to longer summit loops. Birdsong is a constant, thanks to ongoing pest-control and restoration work on these islands, and you can choose anything from an easy shoreline wander to a half-day summit hike. Information boards near the wharves explain the volcanic history and the joint Rangitoto–Motutapu story. On still evenings, a dinghy potter along the shoreline gives close views of rocky ledges and small beaches. If legs are tired, simply sit in the cockpit and watch the ferry wake roll across the bay like a slow-motion ripple.
Cautions
Holding can be patchy; set anchor well. Exposed to strong southerlies; watch ferry traffic near the wharf.
Facilities
No fuel or shops at Islington Bay; full marina facilities back at Bayswater, plus city groceries and services
Day 2 – Islington Bay to Kawau Island
28 nautical miles
5hrs sailing time
LUNCH STOP:Tiritiri Matangi
MOORING:Anchor in Bon Accord Harbour or book RNZYS moorings; fuel and water available at Kawau Boating Club wharf.
Description
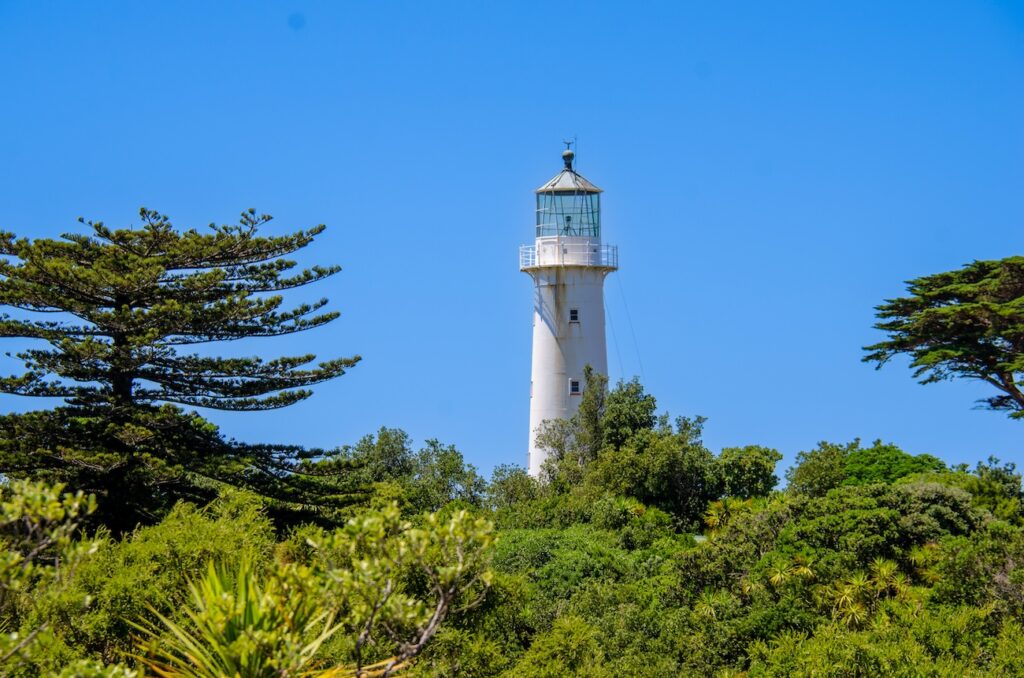
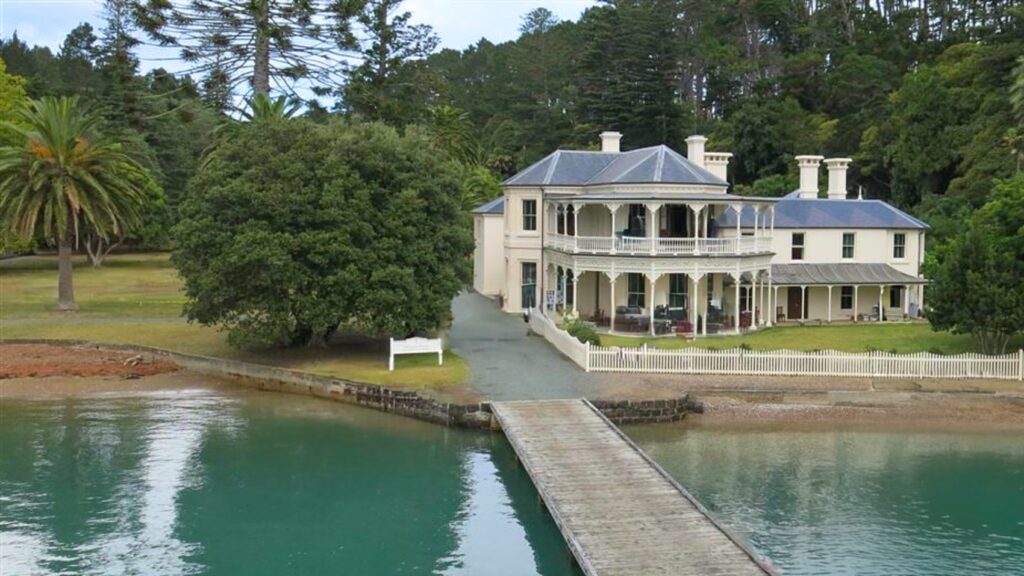
Leaving Islington Bay, you thread out into the wider gulf, with Rangitoto dropping astern and the islands opening ahead. A stop at Tiritiri Matangi for lunch breaks the passage nicely; the island’s pest-free sanctuary slopes gently into clear water, and the lighthouse stands out on the skyline like a friendly landmark. From there, Kawau Island rises green and welcoming, Bon Accord Harbour cutting deep into its western side. Steep, bush-clad hills shelter the water from many directions, so the harbour often feels calmer than conditions outside. Historic homes, jetties and moorings dot the shoreline, but the overall mood remains relaxed and slightly old-fashioned. Evening light along the bay is particularly good, with the surrounding hills glowing and the water turning a rich, dark blue. On one long day here I misjudged how many snacks the crew would want; by mid-afternoon we were down to the “emergency biscuits.” No-one minded once Kawau’s hills appeared and the harbour smoothed out.
Attractions
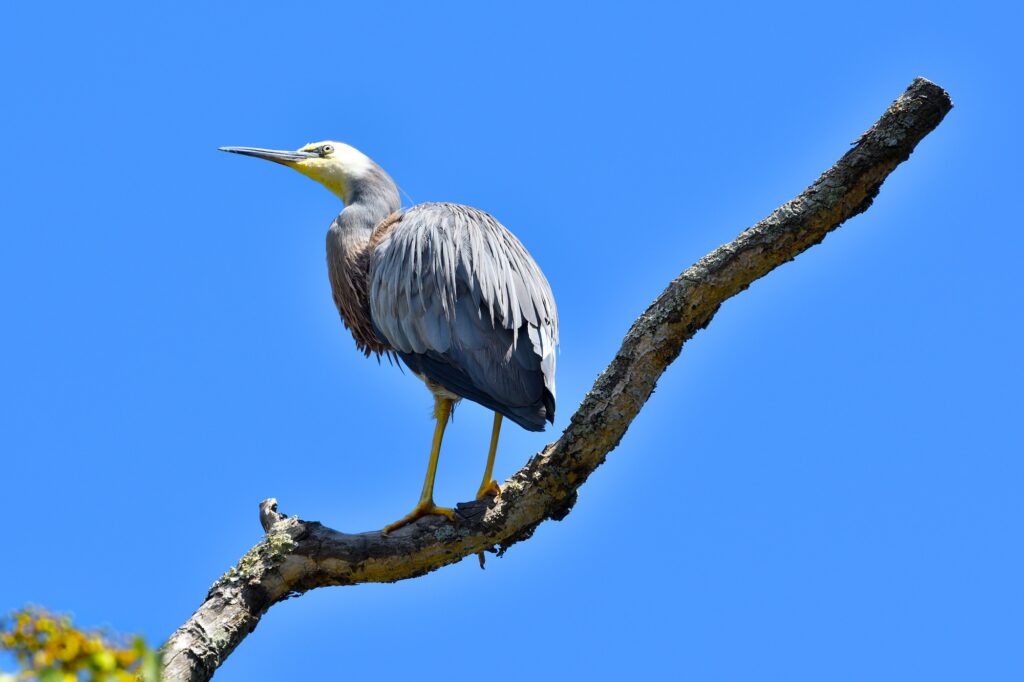
If you go ashore at Tiritiri Matangi, you can check out the lighthouse. Or, the quieter eastern tracks, away from the main lighthouse route, offer some of the best bird encounters in the gulf, with saddlebacks, stitchbirds and other rare species often visible at close range thanks to years of restoration work. On Kawau, walks from Mansion House Bay lead past historic buildings, gardens and the remains of the copper mine and smelting works, giving a sense of both colonial industry and modern conservation. The Kawau Boating Club and other local businesses provide a social hub, offering meals and a chance to swap stories with other crews when open. Swimming and paddle-boarding inside Bon Accord Harbour are popular on calm days, and many coves around Kawau offer sandy beaches and short, informal tracks up to lookouts. Hidden corners of the harbour can feel surprisingly quiet even when the main anchorage looks busy, so it’s worth exploring a little by tender to find your favourite nook.
Cautions
Mind ferry and local traffic; give swinging room around private moorings. Check fuel availability with Kawau Boating Club first
Facilities
Fuel (24/7 pay at pump dispenser), water and limited supplies near Kawau Boating Club; cafés and services scattered around the island, no large supermarket
Day 3 – Kawau Island to Rakino Island
22 nautical miles
4hrs sailing time
LUNCH STOP:Moturekareka
MOORING:Anchor in suitable Rakino bay for conditions; all moorings and jetties are private. Confirm any permissions beforehand
Description
The passage from Kawau towards Rakino feels like classic Hauraki Gulf Auckland Sailing: island-to-island, with open water but land in sight most of the way. A lunch stop near Moturekareka Island gives you a dramatic change of scene with its well-known rocky shoreline and Rewa shipwreck. Rakino Island itself is low, green and peaceful, with small bays and headlands rather than big peaks. Woody Bay and other anchorages on the island’s northern and western sides provide good shelter depending on conditions. The landscape feels more open than Kawau or Rangitoto, with fewer tall trees and more grassy slopes and scattered bush. Once you’re anchored, views stretch back towards Auckland city in the distance and across to Motutapu, Waiheke and the outer gulf. After the busier social scene of Kawau, Rakino usually feels much quieter, a place where the loudest sounds might be birds, distant surf, or the soft splash of a paddle as someone heads ashore.
Attractions
Confident swimmers and snorkellers can explore the shallow Rewa shipwreck located on the northeast shore, which is home to schooling fish and easy snorkelling in settled conditions. Rakino’s main attraction is its simplicity. There are no shops or big commercial developments, so the focus is firmly on walking, swimming and unwinding. Tracks and small roads lead across the island to different bays and viewpoints, giving you casual loop walks with plenty of sea views. Collins Bay and other sandy inlets on Rakino’s coastline certainly do match the description of quiet, turquoise anchorages highlighted in Hauraki Gulf island guides, with clear water for swimming and good spots for picnics. With a bit of planning, you can also use Rakino as a stepping stone to nearby wildlife-rich spots, or just treat it as a deliberate pause in the journey. On one visit, a short walk “just to stretch the legs” turned into a friendly chat with a local about their off-grid solar setup and vegetable garden. It’s that sort of place: low-key, neighbourly and slightly off the radar.
Cautions
Limited shelter from strong weather shifts; no services. Check charted rocks and give good clearance when approaching bays
Facilities
No fuel, groceries or formal services; only small community facilities ashore. Stock up before leaving Kawau or Auckland.
Day 4 – Rakino Island to Man o’ War Bay (Waiheke Island)
17 nautical miles
3hrs sailing time
LUNCH STOP:none planned
MOORING:Anchor off Man o’ War beach in suitable depths; swing room can be tight on busy days. Confirm any restrictions
Description
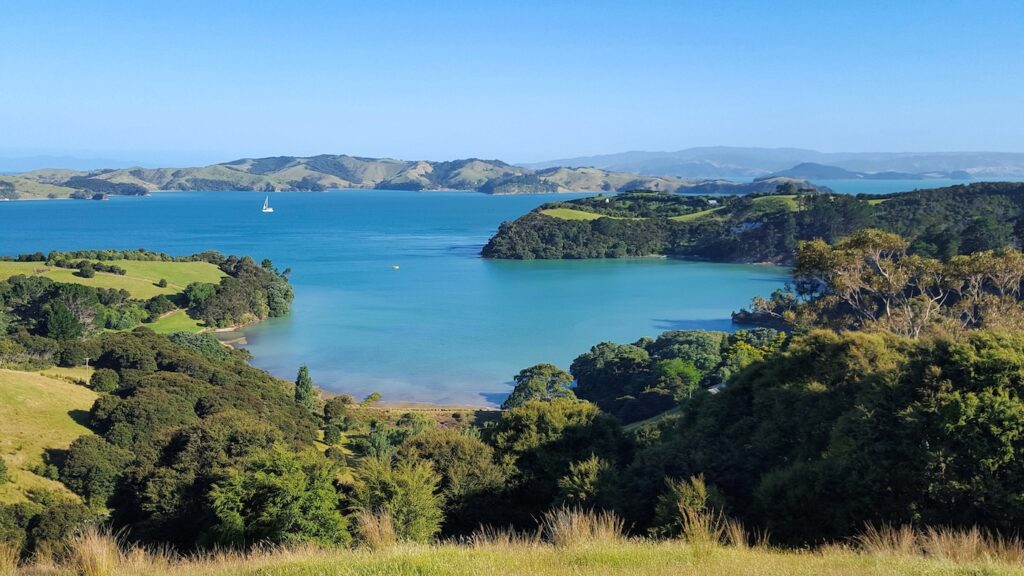
The sail from Rakino down the outer side of Waiheke gives a sense of open water while still staying well within the gulf’s protective arms. As you close the northeastern end of Waiheke, low hills and vineyard country appear, with long fingers of land framing quiet coves. Man o’ War Bay itself curves gently, backed by vineyards, farmland and patches of restored native bush. The beachfront tasting room and lawns sit just behind the sand, framed by pohutukawa trees and headlands. By late afternoon, anchored off the beach, you can watch the light shift across the vines and hillsides while small waves lap the hull. The bay feels a little more polished than Rakino but still relaxed. Boats drop in for lazy lunches or evenings under the trees, often mixing local launches and visiting cruising yachts. It’s a comfortable place to linger if the crew fall in love with the setting, which happens fairly often.
Attractions
Ashore, Man o’ War Vineyards offers tastings, shared plates and picnics on the grass under big coastal trees, with views back over the anchorage. You can stroll the beach, explore small headland tracks, or simply enjoy the vineyard setting without going far from the dinghy. Further afield on Waiheke, a wide network of walking tracks and other wineries mean you could easily turn this stop into a longer land-based exploration, using local transport or pre-arranged transfers from the bay. The eastern end of the island also offers quieter coastal nooks ideal for kayaking and paddle-boarding when weather allows, with rocky points, small beaches and clear water. The Stony Batter Historic Reserve is just a short road transfer from Man o’ War Bay bringing you to rolling farmland dotted with boulders and the entrance to a huge WWII fortress: 1.2 km of hand-cut tunnels, chambers and gun pits, now open on guided tours. It feels like another world compared with the vineyards down on the coast. One small lesson from here: sunscreen and sunhats matter. A “quick tasting” on the lawn can stretch into hours, and the combination of sunshine, sea breeze and good wine sneaks up faster than you might expect.
Cautions
Open to some wind and swell directions; check forecast and avoid overstaying in fresh onshore conditions. Mind shallow areas near shore
Facilities
Winery food and drinks ashore; no fuel or large grocery store in this area of Waiheke. Treat this as a hospitality stop, not a reprovision.
Day 5 – Man o’ War Bay to Te Kouma / Whanganui Island (Coromandel)
15 nautical miles
3hrs sailing time
LUNCH STOP:none planned
MOORING:Multiple anchorages within Te Kouma Harbour; good holding in mud. No major marina. Confirm any private moorings before use
Description
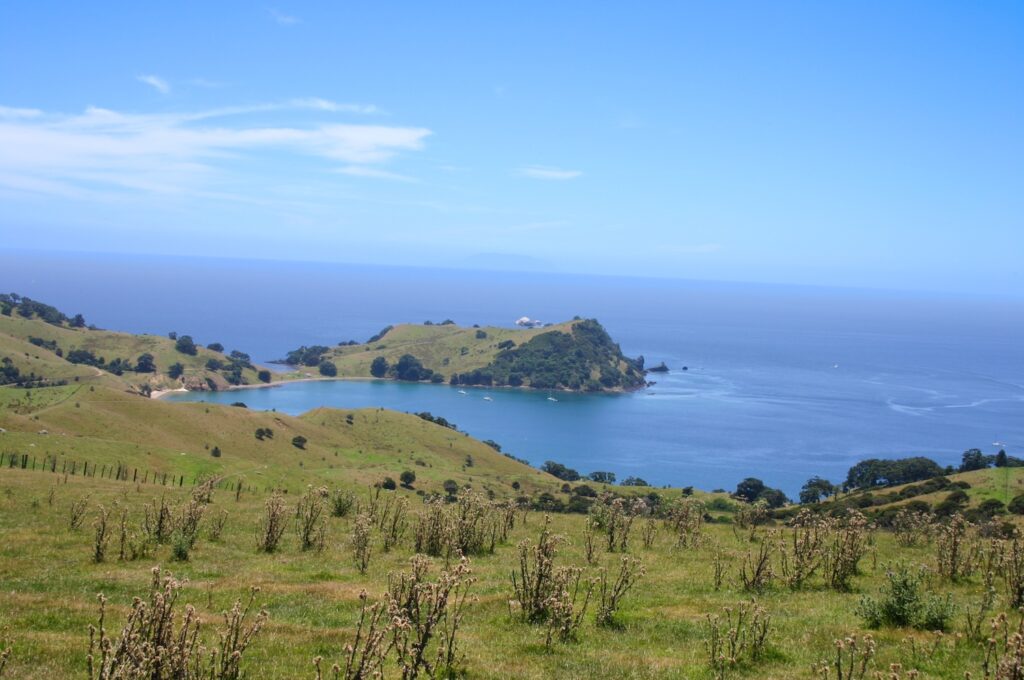
Crossing from Waiheke’s eastern tip towards the Coromandel coast, the gulf feels broader and slightly wilder, though land remains in view. The hills behind Te Kouma and Whanganui Island rise in soft folds, dotted with pasture, pockets of bush and a line of pohutukawa along the foreshore. Inside Te Kouma Harbour you’ll find several well-regarded anchorages, including bays tucked behind sand and sandstone headlands that cut off swell and wind from many directions. Water colour often shifts to a milky turquoise near beaches and deeper green further out, with plenty of birdlife and, at times, visiting dolphins. Compared to the more developed parts of Waiheke, this side of the gulf feels rural and slightly old-fashioned in the best way: farmhouses on slopes, stock near the waterline, and simple jetties pointing out into calm bays. It’s an easy place to sit on deck and just watch the light change across the hills.
Attractions
Te Kouma’s bays are tailor-made for small adventures. You can land on sandy beaches, walk short farm tracks where access allows, and explore rocky shoreline at low tide. But when the tide is up you can jump in the tender and hop over to the Coromandel township. In the township are some great attractions like the Coromandel School of Mines & Historical Museum, the Coromandel Gold Stamper Battery and Muzzas Pottery has some really unique items that are hard to resist From Te Kouma, local operators run sightseeing and mussel-farm tours in the inner gulf, alongside separate fishing charters if the crew want to try their luck with snapper or kahawai. Across the wider Coromandel peninsula, short drives from nearby ports lead to walking tracks, local cafés and craft shops, but even without going far you’ll find plenty to enjoy right by the water. Kayaking around Whanganui Island’s shoreline on a calm day reveals small caves, ledges and nesting spots for seabirds. Fishing can be rewarding in these waters too, especially along drop-offs and reef edges noted in local boating guides. A friend once described Te Kouma as “the place where everyone finally stops checking their phones.” It’s not completely off-grid, but the atmosphere nudges you in that direction.
Cautions
Watch charted rocks and shallows near harbour entrance and inner bays. Tidal streams and wind shifts can affect anchoring angles
Facilities
Limited shore facilities; no large fuel dock or supermarket inside Te Kouma. Treat this as a mainly self-sufficient stop. But as mentioned, when the tide is right you can pop into Coromandel township where there is a supermarket, restaurant and takeways
Day 6 – Te Kouma to Putiki Bay (Waiheke Island)
24 nautical miles
4hrs 30mins sailing time
LUNCH STOP:none planned
MOORING:Berths available at Waiheke Marina in Putiki Bay; visitor options and services online. Anchor only where depths and swing clear
Description
The run from Te Kouma back towards Waiheke takes you across the outer Firth of Thames and into more familiar gulf waters. Views open up to include the Coromandel hills, Waiheke’s spine, and on clear days even distant ranges inland. Seas here can feel a touch more open, but you’re still within sight of land almost the whole time. Putiki Bay on Waiheke’s southern side wraps around like a sheltered arm, home to houseboats, local marina facilities and a calm inner basin. Mangroves and mudflats fringe parts of the shore, giving the bay a softer, more enclosed feel than the open beaches on Waiheke’s northern coast. It’s a practical and interesting stop late in the voyage. You get a working-boatyard vibe near the marina and haul-out facilities, plus glimpses of local life from the houseboats and jetties. It’s a comfortable place to prepare for the final leg back to Bayswater.
Attractions
From Putiki Bay you can access a wide range of Waiheke activities with local buses, taxis or hire options. That includes other vineyards, coastal walks and swimming beaches on the island’s northern side, plus cafés and galleries in the main village areas. Closer to the bay, a stroll along the shoreline shows how the area has evolved from tidal wetlands to a mix of marina infrastructure, moored boats and local housing. The marina and boatyard provide a chance to check underwater gear, top up any minor spares from chandlery services, or simply enjoy watching other boats lifted and relaunched. On one visit, a quick wander up from the docks turned into an impromptu chat with a boatbuilder about a clever self-steering setup on a small yacht. It’s that sort of bay: practical, slightly scruffy in places, but full of people who live and breathe boats.
Cautions
Inner bay is shallow and silty; follow marked channel to marina. Watch houseboats and local moorings when manoeuvring
Facilities
Marina with power, water, haul-out and hardstand; limited local groceries and services on Waiheke reachable by road
Day 7 – Putiki Bay to Bayswater Marina
14 nautical miles
2hrs 30mins sailing time
LUNCH STOP:none planned
MOORING:Pre-book berth at Bayswater Marina; full-service facility with long-term and visitor options. Contact office directly for current rates
Description
The final leg threads you back towards Auckland, often with Rangitoto off one bow and the city skyline gradually sharpening ahead. Leaving Putiki Bay, you re-enter the busier lanes of the inner gulf, with ferries, recreational traffic and the familiar shapes of nearby islands framing the route. Rounding into the Waitematā, the harbour bridge becomes the key landmark once again. Bayswater sits just north of Devonport, offering a quiet base with excellent views back towards the city. Berths have power, water, security and easy access ashore, so the practical side of finishing your trip is straightforward. There’s a real sense of completion as you nose back into the marina, lines ready. You’ve circled through wildlife sanctuaries, tranquil islands, vineyard shores and rural harbours, then returned to the city of sails by water, which always feels more satisfying than arriving by road.
Attractions
Back at Bayswater, you can choose between a quiet tidy-up day or a final city outing. Ferries and local transport make it simple to reach central Auckland for dining, shopping or museum visits, or to wander Devonport’s waterfront and hilltop viewpoints. If you want one more walk, North Shore coastal paths offer harbour views and small beaches within easy reach. The marina’s shore facilities make post-cruise jobs easier: laundry, showers and simple logistics like meeting taxis or airport shuttles. For crews with extra time, you could even keep the boat in Bayswater a little longer and run short local sails around the inner gulf. A personal favourite ritual is a simple coffee on deck while the city wakes up across the water. After a week around the gulf, the skyline feels familiar rather than imposing.
Cautions
Busy harbour: ferries, shipping and recreational craft. Follow marked channels, monitor VHF, and respect speed and wake limits
Facilities
Power, water, Wi-Fi, security, laundry, bathrooms; access to city groceries, restaurants, medical services and marine trades nearby
Facilities Summary
Stop
Water
Fuel
Power
Groceries
Restaurants / Café
Medical / Pharmacy Access
Bayswater Marina
✅
✅ nearby
✅
Large nearby
Many in city/Devonport
Full city services
Islington Bay (Rangitoto/Motutapu)
⚪
⚪
⚪
⚪
⚪
⚪
Kawau Island (Bon Accord area)
Limited
Limited
Limited (club/wharves)
Very small / limited
Club bistro / seasonal
Limited, off-island only
Rakino Island
⚪
⚪
⚪
⚪
⚪
⚪
Man o’ War Bay, Waiheke
⚪ (boat only)
⚪
⚪
⚪ small items only
Winery restaurant
Off-island (Waiheke clinics)
Te Kouma / Whanganui Island
Limited
⚪
⚪
⚪
⚪ / very limited
Off-island (Thames/Coromandel)
Putiki Bay, Waiheke (Waiheke Marina)
✅ (marina)
Limited (local)
✅
Small/medium via road
Cafés/restaurants elsewhere on island
Clinics and pharmacy on Waiheke
Consider the Reverse Route
Sailing this route in the described direction works well with common patterns of use in the Hauraki Gulf. You start with shorter inner-gulf legs, step gradually into slightly more open water towards Kawau and Te Kouma, then return via Waiheke with options to shorten or extend the final days depending on weather and crew energy. The longer passages, like Islington Bay to Kawau and Te Kouma to Putiki, sit mid-trip when routines are bedded in. Reversing the voyage is certainly possible. You would head first into the Firth of Thames and Coromandel side, where winds and chop can be livelier when opposing tides, then work back via Waiheke, Rakino and Kawau. For less experienced crews, tackling the more exposed section later might feel more comfortable, once everyone is used to the boat and local forecasts. On the other hand, starting with the city-to-Waiheke hop and building outwards offers a steady progression in both scenery and complexity, keeping average daily times modest and giving several protected bolt-holes if forecasts tighten. In practice, choice of direction should be tuned to the expected wind pattern during your dates, using regular MetService marine updates and local advice.
Support Aids
Whether chartering or welcoming friends onboard your own yacht, these FREE KiwiSailor aids will come in handy and help ease your preparations ….meaning the first drink on this journey is so much more enjoyable:
There are so many variables to consider when planning an itinerary and estimating sailing times and distances, so one needs to appreciate that these are an estimate only.
Read MoreLess
Planned Stopping Locations
As they say, you always plan to ‘sail toward’ and not ‘sail to’, as something unplanned could happen. So one should also consider a ‘bolt-hole’ (a sheltered location where a you can find refuge from bad weather for example). I have not planned for these as there are naturally many variables and options to allow for. So look ahead in the plan and always keep an eye on the weather.
Sailing Distance
I use a planning method that adds a safety margin and thus produces a distance, which tends to be 10–20% longer than charted straight-line or optimised-tool calculations. Assuming:
clearing headlands
tacking angles in light wind
staying outside rocky headlands/fringes
not hugging the coastline
Sailing Time
Sailing time is obviously a function of distance and speed, and again speed can vary considerably. My approach here assumes:
round to the nearest 30 mins
relatively clean hull
a cruising speed of 6 knots, which provides small allowances for:
leaving and entering harbours (but ignore berthing or for example anchoring drop/retrieval time)
trimming sails
occasional lulls
motor sailing if wind is too light to maintain 6 knots
Ultimately my approach is to allow for “steady” sailing as you would normally on vacation, rather than sporty Saturday racing at the local club.
To provide the best experiences, we use technologies like cookies to store and/or access device information. By clicking Accept you are consenting to these technologies and this will allow us to process data such as browsing behaviour or unique IDs on this site. By clicking the close button ‘X’ you will not be consenting, which may adversely affect certain features and functions.
Functional
Always active
The technical storage or access is strictly necessary for the legitimate purpose of enabling the use of a specific service explicitly requested by the subscriber or user, or for the sole purpose of carrying out the transmission of a communication over an electronic communications network.
Preferences
The technical storage or access is necessary for the legitimate purpose of storing preferences that are not requested by the subscriber or user.
Statistics
The technical storage or access that is used exclusively for statistical purposes.The technical storage or access that is used exclusively for anonymous statistical purposes. Without a subpoena, voluntary compliance on the part of your Internet Service Provider, or additional records from a third party, information stored or retrieved for this purpose alone cannot usually be used to identify you.
Marketing
The technical storage or access is required to create user profiles to send advertising, or to track the user on a website or across several websites for similar marketing purposes.